How does Subdivisio work?
Well, to be honest, an important part of the answer to that question is...you!
Subdivisio is an example of algorithmic art, a process that requires two essential ingredients: an algorithm and an artist.
While it is beyond the scope of this humble website to explain you, we can take a crack at understandinig the algorithm.
Subdivisio is based on a process of subdividing shapes according to an algorithm that includes three main parts:
- Defining a subdivision rule
- Defining a subdivision mapping
- Repeatedly subdividing using the rule and the mapping
We'll take these one at a time.
Part 1: Defining a subdivision rule
First, let's look at the geometric construction rule that subdivides our initial square into 3 smaller cells.
Take a moment to drag the red point E in the diagram and observe what happens.
A few key things to notice are:
- Point E is the only draggable point and is constrained to line segment AB
- The value of t is equal to a number from 0 to 1 and corresponds to the position of point E along line segment AB
- Point F is constrained to line segment AD and point G is constrained to the diagonal AC (which is partially hidden)
- The position of points F and G are also determined by the value of t
- The initial square has been divided into 3 smaller cells which can be identified by their vertices: AEGF, EBCG, and FGCD,
To summarize, the above diagram was constructed as follows:
- Given points A, B, C and D
- Construct line segments AB, BC, CD, AD and diagonal AC
- Construct a point E on line segment AB
- Define parameter t based on the position of E
- Construct point F on line segment AD using the value of t
- Construct point G on line segment AC using the value of t
- Hide line segment AC
- Construct line segments EG, FG and GC
We have defined a construction rule that subdivides our initial square into 3 smaller cells, and each of those cells is also a 4-sided shape.
Next we need to think about what information will be necessary to specify how we can apply this rule again to further subdivide our shapes.
Part 2: Defining a subdivision map
In part 1, we defined a geometric construction rule that was based on 4 input points: A, B, C and D.
In order to further subdivide, we will repeat this same rule 3 times using the vertices of the smaller cells as the inputs rather than the original vertices.
For now, let's just focus on subdividing cell 1, defined by the vertices A, E, G and F. In order to subdivide cell 1, we have to decide which of the cell's vertices will correspond to points A, B, C and D in our subdivision rule.
To see why this is important, take a moment to click on the 'Rotate Cell 1' button and observe what happens in the diagram and the construction rule below. (Feel free to drag your old friend point E while you are here as well)
A few key things to notice are:
- Clicking on the 'Rotate Cell 1' button changes the rule by altering which line is the diagonal and along which line segments new points are constructed
- This can be seen in the diagram as the orientation of the subdivided cell rotates counter-clockwise and returns to the original position after 4 rotations
The 'Rotate Cell 1' button is changing our subdivision rule for cell 1. When we click on it, we change how the points A, B, C and D in the rule are being assigned to the vertices of cell 1 as we further subdivide that cell.
The way we define this vertex assignment for cell 1 is what we refer to as our subdivision mapping for cell 1. Similarly, the 'Rotate Cell 2' and 'Rotate Cell 3' buttons in Subdivisio also change the subdivision mapping for those cells.
Now that we have defined both our subdivision rule and mapping, we are ready to repeatedly subdivide.
Part 3: Time to subdivide again...and again...TADA!
This is where the magic of repeating a simple rule over and over begins to produce interesting results.
We have defined both our subdivision rule and our subdivision map. Now we can select the number of times that we want to repeat these to divide the shape into more and more cells, with each subdivision dependent on the one that came before it.
Take a moment and explore the visual effect of repeated subdivision. Do you notice any patterns that emerge as you increase the number of subdivisions or rotate cells?
Part 4: Variations on the subdivision rule
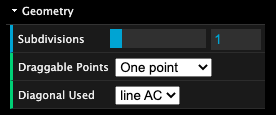
For the example shown here, the diagonal of the initial square used has always been line segment AC and we have always had only one draggable point.

In the full Subdivisio experience:
- The 'Diagonal Used' drop down menu allows you to choose which diagaonal (AC or BD) is used in the subdivision rule.
- The 'Draggable Points' drop down allows you to determine whether the position of F and G are dependent on the position of point E and that value t or if they are independently draggable.
That's it! Now that you've read about the subdivision rule and mapping used to create Subdivisio, perhaps you can try to come up with your own initial shapes and subdivision algorithms. The possibilities are truly endless...